When it comes to improving the aesthetics and functionality of your home, painting your interior doors is an often-overlooked yet highly effective solution. A fresh coat of paint not only rejuvenates old, worn doors but also helps to enhance the overall look of your space. Whether you're looking to refresh a single door or tackle multiple doors in your home, knowing how to properly paint them can make a huge difference in achieving a smooth, professional finish.
In this step-by-step guide, we'll walk you through the process of painting interior doors, from preparing the surface to the final touch-ups.
By following these easy-to-understand instructions, you can transform your doors and add new life to your home. Let’s get started with the essential steps, tips, and techniques that will ensure your doors look their best.
Why Painting Interior Doors is Important
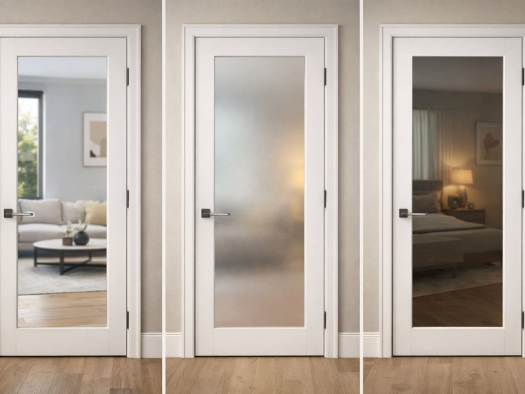
The importance of painting interior doors cannot be overstated. Not only does painting help preserve the door’s material, but it also has significant aesthetic benefits. Over time, doors can accumulate dirt, scratches, and scuffs, especially in high-traffic areas. A new coat of paint can conceal imperfections and give the door a brand-new appearance. This simple improvement can significantly enhance the overall look of a room, complementing other home improvements such as updated flooring or wall colors.
Additionally, painting serves a protective function. It helps to seal the door, preventing moisture damage and wear from humidity, particularly in areas like kitchens and bathrooms. A high-quality paint finish can also increase the door’s durability, ensuring that it lasts longer and performs better. Whether you're preparing to sell your home or simply wish to enhance your living space, painting your doors is an easy and affordable way to boost the value of your property.
What You’ll Need: Essential Tools and Materials
Before starting your door painting project, it's essential to gather the right tools and materials. Using the correct supplies will not only make the job easier but also help achieve the best results. Here’s a list of the basic tools and materials you’ll need:
- Paint: Choose a high-quality paint suitable for interior doors. Latex paint is a common choice for its ease of application and quick drying time. Oil-based paints, while more durable, take longer to dry and require additional ventilation.
- Primer: Primer helps ensure better paint adhesion, especially on raw or previously painted surfaces. It also creates a smooth base, which is particularly important if you’re painting a darker door with lighter paint.
- Paintbrush: A high-quality synthetic brush is ideal for smooth, even strokes. For panel doors, use a smaller brush for detailed areas.
- Paint Roller: A foam roller can be used for larger, flat areas to ensure even coverage without streaks.
- Sandpaper: Lightly sand the door before painting to remove any imperfections and provide a smooth surface for the primer and paint.
- Drop Cloth and Painter’s Tape: Protect your surrounding areas from paint splatters and ensure sharp, clean edges around the door.
Having these tools and materials ready will ensure a smooth and efficient painting process.
Step 1: Preparing the Door for Painting
Proper preparation is key to achieving a professional-looking finish. Follow these steps to ensure your door is ready for painting:
- Remove the Door from Its Hinges: Use a screwdriver to take the door off its hinges. This gives you full access to the entire surface, allowing you to paint evenly.
- Set Up a Workspace: Lay the door flat on a pair of sawhorses or a clean, flat surface covered with a drop cloth. This will catch any paint drips and protect your workspace.
- Remove All Hardware: Take off knobs, locks, handles, and any other hardware. This prevents paint from splattering on these parts and ensures a clean, uniform finish on the door.
- Mask Off Areas You Don’t Want to Paint: If the door has glass panels or intricate trim, use painter’s tape to cover these areas, protecting them from paint.
- Clean the Surface: Use a damp cloth to wipe away dust, dirt, or grease, which can interfere with paint adhesion. Ensure the door is completely dry before proceeding.
- Sand the Surface: For a smoother finish, lightly sand the door to remove any rough spots or old paint layers. This will help the new paint adhere better.
Once the door is clean, dry, and prepped, you’re ready to move on to the next step!
Step 2: Priming the Door
Priming is an essential step in the painting process, especially if the door has never been painted before or if you're making a significant color change. The primer acts as a bonding agent that ensures the paint adheres well to the surface and lasts longer. It also helps to hide any stains or imperfections in the wood or previous layers of paint.
Choose the right primer based on your door's material. If you’re painting a wooden door, an oil-based primer is often recommended as it provides excellent coverage and helps prevent tannin stains from bleeding through. For doors made of metal, a rust-inhibiting primer is a must to ensure long-lasting protection. Apply a thin, even coat of primer using a brush or roller, depending on the surface. Make sure to cover all areas, including the edges and panels, and allow the primer to dry completely before proceeding to the next step.
In most cases, one coat of primer will suffice, but if you’re working with an old door or a darker color, you may want to apply a second coat for better coverage. Once the primer is dry, lightly sand the surface again to remove any imperfections before moving on to the paint.
Step 3: Choosing the Right Paint for Interior Doors
The type of paint you choose for your interior doors can significantly affect the final look and durability. There are two main types of paints to consider for interior doors: oil-based and latex-based.
- Oil-based Paint: Known for its durability and smooth, glossy finish, oil-based paint is ideal for doors that need to withstand heavy use. It dries slower than latex paint but provides a tougher, more resilient finish. It’s great for high-traffic areas where the door will be subjected to frequent handling.
- Latex Paint: Latex paint is water-based and dries much faster than oil-based paint. It’s easier to clean up (simply use soap and water), making it a popular choice for many DIYers. It’s available in a variety of finishes, from matte to satin to gloss. For interior doors that don't experience heavy wear, latex paint is a great option due to its ease of application and quick drying time.
In terms of finish, consider the look you're going for. A glossy finish gives the door a sleek, shiny appearance, while a satin or semi-gloss finish offers a more subtle, durable sheen that resists stains and fingerprints. Matte finishes, though stylish, can show more wear over time.
Step 4: Painting the Door
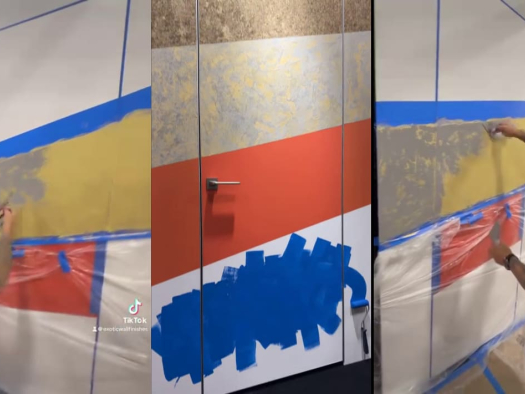
Once your primer is dry and you've selected the appropriate paint, it’s time to start painting. Begin by painting the edges of the door with a small brush to avoid drips. Then, use a larger brush or a foam roller to cover the flat surfaces. Apply the paint in thin, even coats, working with the grain of the wood (if it’s a wood door) to ensure a smooth finish.
It’s best to apply multiple thin coats rather than one thick coat. Thin layers dry faster, resulting in a smoother, more professional-looking finish. Allow each coat to dry completely before applying the next, and be mindful of the drying times specified on the paint can. For doors with panels, use a brush to get into the corners and detailed areas, ensuring that the paint doesn’t pool or drip.
When using a foam roller, make sure to roll the paint evenly and avoid overloading the roller with paint, as this can cause streaks. After painting, inspect the door for any missed spots or imperfections and touch them up as needed.
Step 5: Allowing the Paint to Dry and Applying Additional Coats
Drying time between coats is crucial for achieving a flawless finish. While some paints dry quickly to the touch, they may require more time to cure fully. Allow the first coat to dry completely before applying a second coat. In general, you’ll need at least two coats of paint for optimal coverage and durability, but depending on the color and type of paint used, you may need a third coat.
Ensure that the door is placed in a well-ventilated area to speed up the drying process. Avoid touching the door until it has dried completely to prevent smudges or fingerprints. Once the final coat is applied, let the door dry for a minimum of 24 hours before handling.
Step 6: Reattaching Hardware and Final Touches
After the paint has fully dried, carefully reattach the hardware that was removed earlier. Take extra care when reattaching the hinges, doorknobs, and locks, as they can scratch the newly painted surface. If necessary, apply a light touch-up to any areas that might have been affected during the hardware reinstallation.
Once everything is reassembled, inspect the door for any imperfections or missed spots. If you find any, touch them up with a small brush. Be sure to allow any touch-ups to dry completely before using the door.
Tips for Maintaining Painted Interior Doors
To keep your newly painted interior doors looking fresh and pristine, regular maintenance is essential. Here are some tips to help you maintain their appearance:
- Clean with a Soft Cloth: Use a soft cloth and a mild cleaning solution to wipe down the door. This helps avoid scratching the paint while keeping it clean.
- Avoid Harsh Chemicals: Refrain from using harsh chemicals or abrasive cleaners, as they can damage the finish of the paint.
- Touch-Ups for Heavy Use: If the door experiences heavy use, keep some leftover paint on hand for quick touch-ups. This will help maintain the door's appearance and prevent visible wear.
- Address Scuffs and Scratches: Over time, minor scuffs or scratches may appear. With a little care and attention, you can easily touch these up to preserve the paint job.
By following these tips, you can maintain the beauty and longevity of your painted interior doors.
When to Call a Professional
While painting interior doors is a manageable DIY project, some situations may warrant professional help. If your doors have intricate designs or are made of high-end materials that require special care, it may be best to hire a professional painter. Additionally, if you have several doors to paint or are working with time constraints, a professional can provide a faster and more efficient service.
Professionals can also handle issues like prepping doors for complex paint jobs, such as creating textured finishes or using specialized paints. If you're unsure about taking on the project yourself, contacting a painting service is a great option.
Why Choose Indigo Doors for Your Interior Doors

At Indigo Doors, we specialize in providing high-quality interior doors that not only enhance the beauty of your home but are also easy to maintain. Whether you're looking for classic designs or contemporary styles, our doors are crafted to suit every taste and interior design. We also offer expert advice on how to care for and maintain your doors, ensuring they stay in top condition for years to come.
Explore our extensive collection of interior doors and let us help you choose the perfect style for your home. Our team is here to guide you through every step of the process, from selection to installation.
Conclusion
Painting your interior doors is an effective and affordable way to enhance the look of your home. By following this step-by-step guide, you can achieve professional results and extend the lifespan of your doors. Whether you choose to take on the project yourself or consult a professional, a fresh coat of paint can significantly elevate the aesthetics and functionality of your living space.
Ready to transform your doors? Explore Indigo Doors' selection of contemporary interior doors today and contact us for expert advice or a consultation on how to make your doors shine.